Buche de Noels & Gâteau Brasilia

Week one of term three started with a bang and I had to hit the grown running. Created 3 amazing desserts worthy of being displayed in a pretty little patisserie. I am not tooting my horn here, but these pretty little gateaus and buches were created long ago by amazing French chefs…. I am just bringing them to life with my own twist.

So here are my versions of Raspberry Buche de Noel, Chocolat Buche de Noel & Gâteau Brasilia

20131011-160004.jpg

20131011-160015.jpg

20131011-160036.jpg

Back to biznez

After 2 weeks of vacation, I was more than happy to get orders from clients. Oh sure, holidays are fun when you have a cool getaway planned. But alas I had none and having enjoyed my down time was super pumped to get back to biznez!

So I thought I’ll share a couple of picture….

20130930-191056.jpg
Orange PoppySeed cupcakes with Cream Cheese Frosting

20130930-191219.jpg
Chocolate Ganache Cake for a birthday.

Loved getting back into the groove and can’t wait for more to come!

Gluten Free? No Butter? Yes Indeed!

This is my normal reaction when I see the words gluten free or low fat desserts… Yuck.. Blerghh.. Don’t get me wrong, I have tried some of those desserts but they kinda taste like paper or plastic. So when I saw this recipe, I decided to give it another chance (having recently gained some poundage, being surrounded by desserts everyday!) since I was craving something sinful. And boy it was worth it.

All the ingredients went into a blender, into to the oven and voila! 25 minutes later it was tasting time.

20130921-150618.jpg
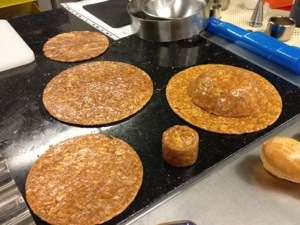
All ready to be baked.

Since sharing is caring, here’s the recipe. Do let me know if it satisfied your cravings!

Ingredients

3/4 cup creamy peanut butter
6 oz. fat free vanilla yogurt
1/4 cup skim milk
1 egg
1/4 tsp salt
1 tsp baking powder
1 cup Splenda
1/2 cup unsweetened cocoa powder
1/2 cup old-fashioned rolled oats

Directions

Preheat oven to 175 degrees. Spray a 8×8 inch pan with non-stick cooking spray. Set aside.

Place all of the ingredients except for the peanut butter into a blender. (Yes, a blender!) For easier blending, place the liquid ingredients into the blender first. Blend until mix is smooth and oats are ground up. You will have to stop the blender and scrape down the sides a few times.

Pour batter into prepared baking dish. Microwave peanut butter for about 30 seconds. Drop melted peanut butter by spoonfuls onto the batter, swirling gently with a knife to create a marbled effect. (Try not to overmix!)

Bake for 20-25 minutes or until brownies begin to pull away from the sides of the pan. Brownies will be extra fudgy, so be sure to wait until COMPLETELY cooled – I stuck mine in the refrigerator for 2 hours, which allowed them to be cut very easily.

Adapted this from spark recipe!

Return of le Gateau

Exam was actually a week ago. After the mayhem and mixed feelings of the exam week, the light at the end of the tunnel was 3 weeks vacation!

20130915-105101.jpg

20130915-105123.jpg
Another decorated version of my gateau (above) and of course all the pretty creations by my fellow course-mates!

Anyway since I’ve previously posted about this gateau, I shan’t go into it again. Here’s to a relaxing vacation.

20130915-105557.jpg
Another angle of my creation. Chef said it looked like the Berlin wall… I think Chef was exhausted…

Pulled, Cast & Blown, Sugar of course!

Basic introduction to sugar. This was what the class was all about. And let me tell you, it was such fun!

20130913-211421.jpg

20130913-211431.jpg
Chef’s sugar piece.

We worked with colors and cast and hot hot boiling sugar which was then poured into molds and shaped as we liked. We then assembled and created our own little masterpieces. All out sugar! It was the last class for the 2nd semester and it was rather relaxing; moulding leaves and making sugar flowers. Downside to all this? Oh just a few blisters here and there….

20130913-211903.jpg
My own little creation!

20130913-211943.jpg
Leaves made from casts.

Sablés & Shortcakes

Sables and shortcakes makes for such light yet gratifying dessert after a heavy meal. I loved these versions of how shortcrust were used. Sable basically means sand; so shortcrust and shortcakes are sandy textured pastries. Enlightening eh?

20130906-141231.jpg

20130906-141245.jpg
Shortcakes & Shortcrust

Sables can be paired with any kind of cream like creme pattisierie, creme chantilly or creme diplomat and any type of fresh fruit or chocolate. The combinatios are endless! My almond short cake was topped with Cointreau macerated strawberries and fresh Chantilly cream, my absolute favourite. It was tart yet sweet and crumbly yet creamy. Such a beauty.

20130906-140738.jpg
Almond Shortcake with Macerated Strawberries & Creme Chantilly

For the normand shortcrust, it was diplomat cream and raspberries. So you get the idea, sable cream, fruit. Simple but when all 3 elements come together, YUM!

20130906-141133.jpg
Normand Shortcrust with Creme Diplomat

Petit Four

Simple yet scrumptious, Petit Four has been a long time favorite for high tea parties. Being one to ALWAYS, and I mean always, indulge in high tea with my girlfriends (and guy friends) back when I was in Singapore, it is rather exciting to be the one learning how to make them. In fact, my 30th birthday was a Champagne Tea Party themed celebration in Equinox. (Although more Champagne was consumed, rather than tea, thank you very much)

So we attempted four types of petit four, how apt right? On the menu; Turkish Almond Sable, Orange Lemon marmalade soft cake, Mini Banana Cake & Chocolate Macarons with Truffle Oil infused Chocolate Ganache. Fancy and nothing I’ve had during my previous tea party sessions.

20130905-115740.jpg
Check out the macarons…

20130905-120450.jpg
Turkish Almond Sable, Orange Lemon marmalade soft cake, Mini Banana Cake

All four petit fours tasted yummy but by far my absolute favorite was the marmalade soft cake. I look forward to throwing my own at-home-tea-parties with these little darlings under my belt.

20130905-120043.jpg
A tower of tea time delights.

Croquembouche

Let it be said that sugar burn payed off. Let it also be said; I don’t wish it (sugar burn, that is ) upon anyone. After all the nougatine work that would consist of the base , column and decoration for the croquembouche , today was the day of assembly and pipping work.

20130903-010819.jpg

Chef Thierry’s masterpiece of a croquembouche.

It took 3 solid hours to pipe the choux with Cointreau flavoured pastry cream, make sugar caramel (boils at 165 degrees, causes aforementioned sugar burn), dip the pastry cream filled choux and assemble it to resemble a tower. A tower of goodness, sweet, soft and crunchy.

This creation called croquembouche is truly apt to be the centre piece of any weddings let alone the French.

20130903-010538.jpg

Part of my humble croquembouche. Photo courtesy of Chef Thierry.

Morsels of Goodness

Chocolate is one of my MAJOR vice. Learning how to temper chocolate couverture was one the most exciting lesson ever.

20130830-234411.jpg
Almond crunch rochers

Tempering chocolate is melting couvertures to the ideal degree and then cooling it down. This ensures that the chocolate holds it shape and doesn’t turn to mush when left at room temperature which is normally 25 degrees. “Playing” with chocolate requires lots (and I mean lots) of patience as chocolate cools fast and you got to be able to work fast to mould or shape it.

20130830-234720.jpg
More rochers .. Dark, Milk and White chocolate.

Having said that, it is worth all the effort, wouldn’t you say?

20130830-234954.jpg
Chocolates with raspberry ganache, apricot ganache and orange Cointreau ganache

Burn baby Burn!!

I rather a knife cut than sugar burn. Good god, it stings so bad! Alas the burn will be worth it, as today prepping was made for the beautiful Croquembouche.

20130829-023136.jpg
Just one of the 4 blisters I obtained from today’s sugar work.. No so sweet, really!

Croquembouche which literally means crunch-in-the-mouth, is a traditional French wedding cake; it is stacked with layers upon layer of choux pastry filled with pastry cream which is then dipped in to caramel.. Yes more sugar work awaits me.. But its so gonna be worth it in the end. Croquembouche is so intricate that we had 2 whole lesson, about 6 hours of work, dedicated to it… Will post more details next week… And finally just wanna wish myself HAPPY BIRTHDAY! I’ve had such a blessed year and the up coming year is going to be more fantabulous.

20130829-023822.jpg
The prep work in progress, next week it’ll all make sense.